Conditionally Change a Label’s Text
This tutorial shows how to change a label’s text based on a condition—without writing scripts—by using a calculated field.
Steps to Conditionally Change Label Text
1. Create or Open a Report
Begin by creating a new report or opening an existing one.
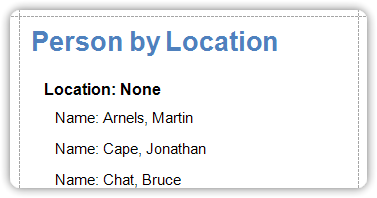
If we run this report layout, there will be some ‘Person’ entities without a location.
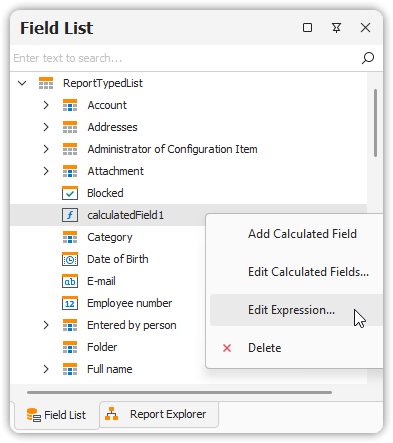
2. Add a Calculated Field
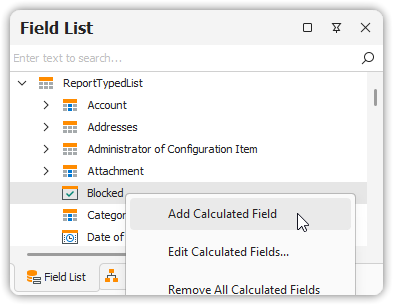
- In the Field List, right-click any item under the dataset.
- Choose Add Calculated Field.
3. Define the Calculated Field Expression
- Select the newly created field.
- In the Property Grid, set:
Field Typeto String- Click the ellipsis (
...) next to the Expression property
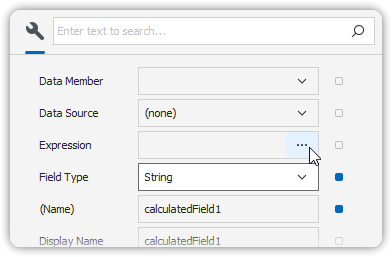
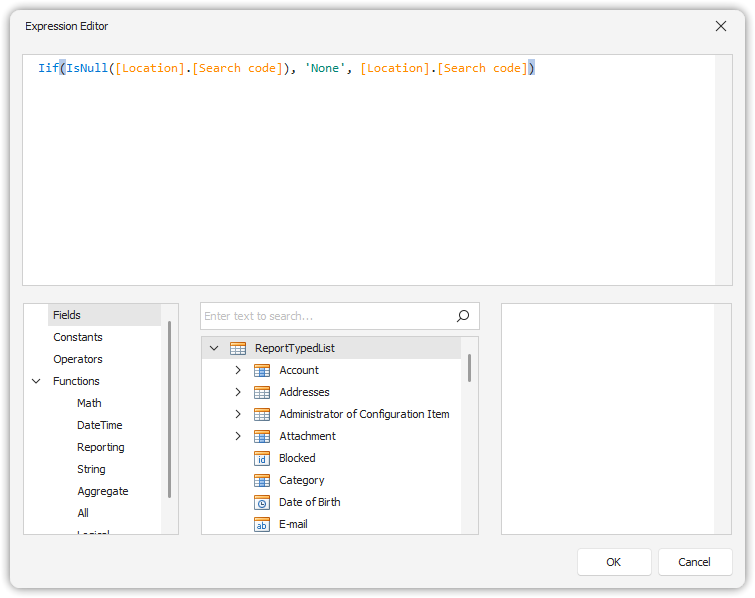
In the Expression Editor, enter a conditional expression.
Example:Iif(IsNull([Location].[Search code]), 'None', [Location].[Search code])This means:
- If the
[Location].[Search code]field has an empty value, display'None' - Otherwise, display the actual value of
[Location].[Search code]
- If the
Click OK to save and close the editor.
4. Add Fields to the Report
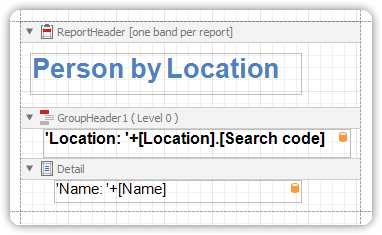
- Drag the necessary data fields, including your calculated field, into the Detail Band.
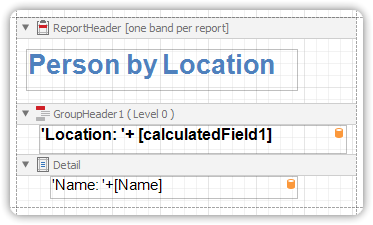
Preview the Result
Switch to the Preview Tab.
The label will now dynamically change based on the defined condition—for example, showing None when [Location].[Search code] is empty.