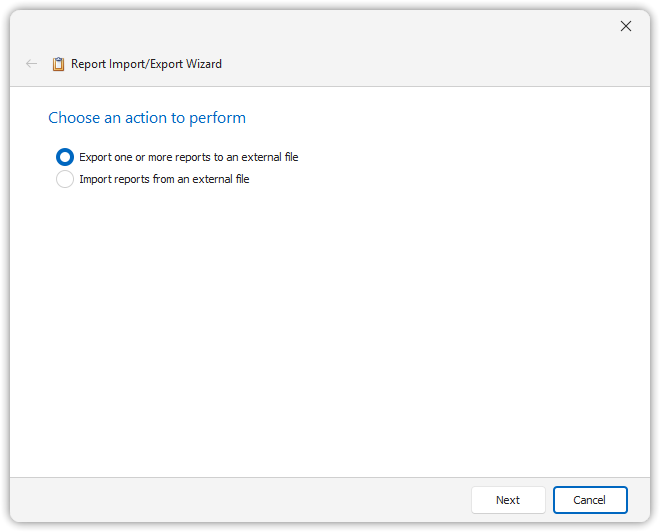
Importing/Exporting Reports
You can export and import reports using the built-in wizard, accessible via:
Administration → Reporting → Reports → Import/Export

Importing Report(s)
- Select Import in the wizard dialog.
- Choose a report file:
- A single report file with
.repxextension - A zipped report package with
.repzextension
- A single report file with
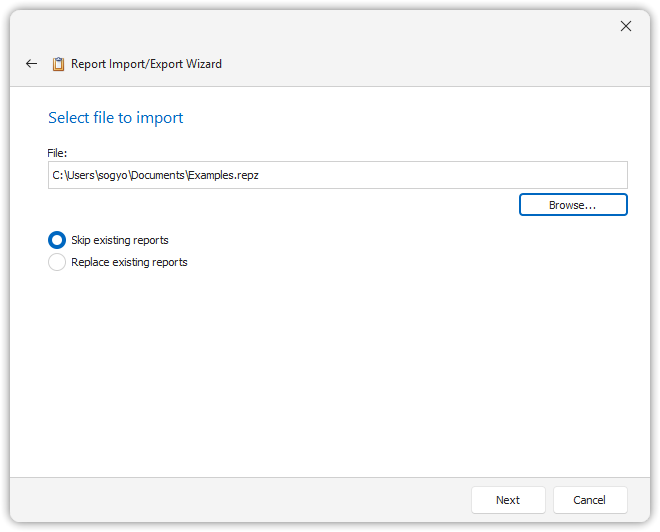
Handling Existing Reports
You have two options for how to handle reports that already exist in the database:
- Skip existing report: Existing reports will not be overwritten
- Replace existing reports: Existing reports will be overwritten by the ones being imported
- After selecting a file, click Next.
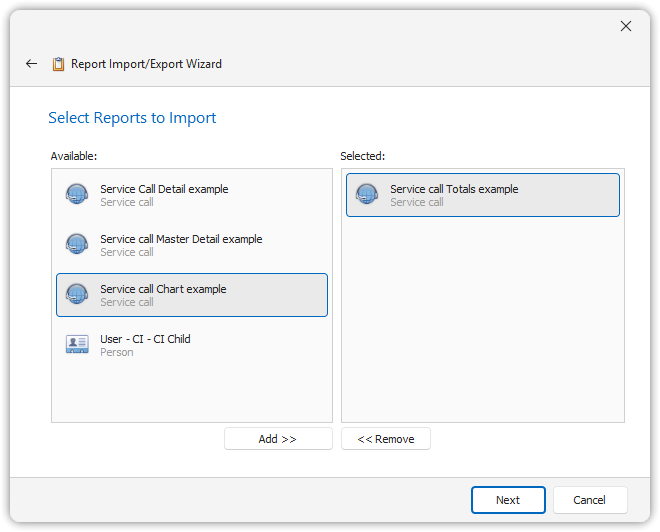
- Select the reports you want to import by clicking Add >>.
- Continue through the wizard by clicking Next to complete the import process.
Resolving Missing Fields
If an imported report references fields not available in the target database, a dialog will appear listing the missing fields.
You can assign alternative destinations to resolve these issues.
Exporting Report(s)
- Choose Export in the wizard dialog.
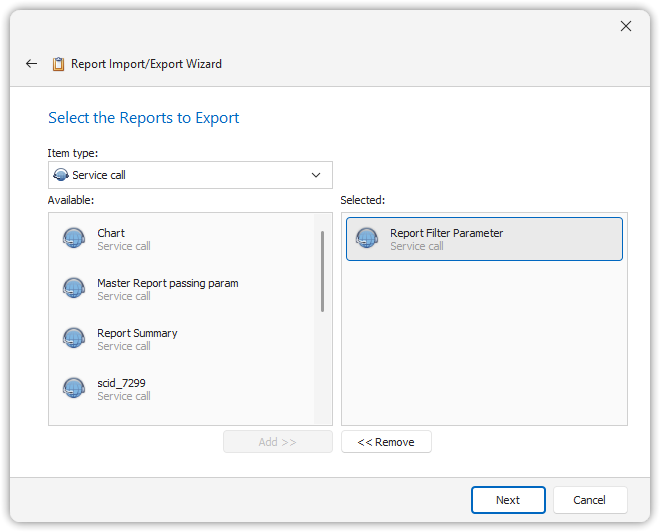
- Select the Item Type and the specific reports you wish to export.
- Click Next, then specify a filename for the export file.
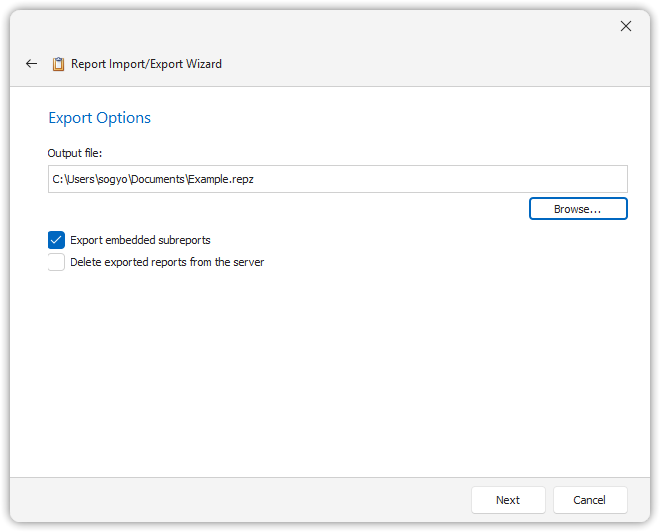
Export Options
- Export embedded subreports: Includes all linked subreports in the export file.
- Delete exported reports from the server: Removes the reports from the database after exporting.
Click Next to finalize the export.
This wizard-based import/export functionality helps transfer reports between environments or share them across users.