Multi-Column Report
This tutorial explains how to create a multi-column report, where each page is divided into multiple vertical columns. This layout is useful for grouped lists, label-style layouts, and compact data display.
Example: Grouped Multi-Column Report
Step 1: Configure Multi-Column Options
- Select the
Detail Bandon the report surface. - In the Property Grid, expand the Multi-Column Options section.
Step 2: Choose the Column Mode
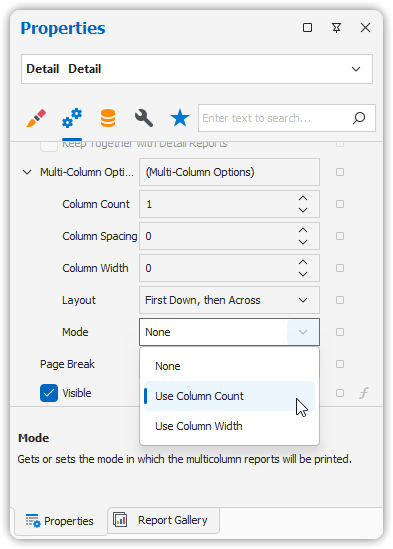
- Set the Mode:
- Determines whether to manually define the number of columns (
Use Column Count)
or base it on a fixed column width.
- Determines whether to manually define the number of columns (
For this example, choose
Use Column Count.
Step 3: Define Column Layout
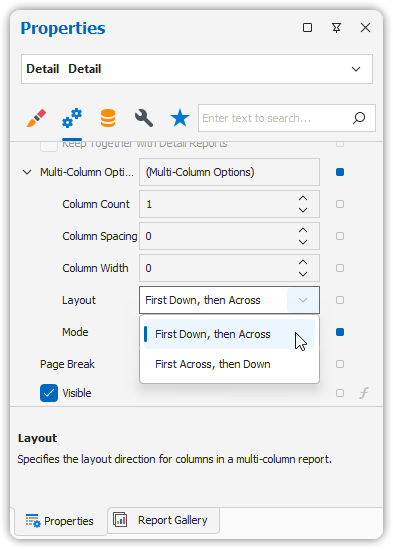
- Column Count: Set to
2 - Column Spacing: Set to
10(units based on your report’s measurement settings) - Direction: Controls the order in which records are filled:
- Across then down
- Down then across (depending on your design goal)
Step 4: Adjust Layout in Design Surface
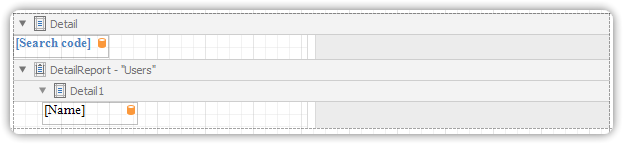
- On the Detail Band, a grey shaded area appears.
- This area shows the available width per column.
- Ensure all controls (text boxes, images, etc.) fit within this boundary.
Preview the Result

Switch to the Preview Tab to render the report.
You’ll see data displayed in two columns per page according to the settings you configured.
🎯 This format is ideal for address books, multi-label reports, compact item listings, and more.